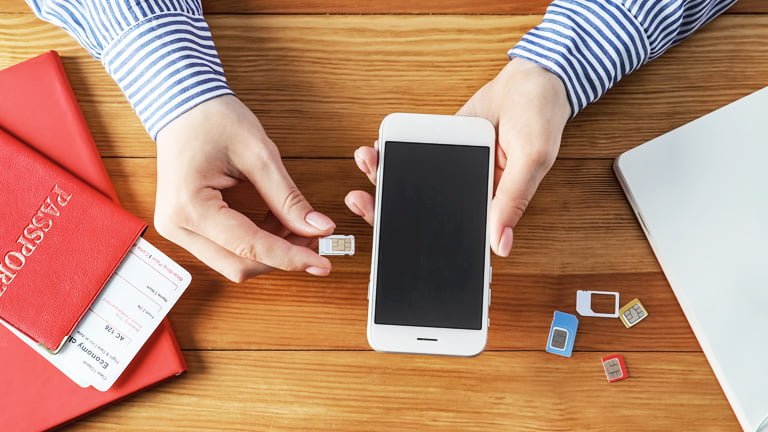
SIM cards are used to identify and authenticate a mobile device on a mobile network. They are small, portable chips that are inserted into a mobile phone or other cellular device to enable communication with the network. There are various situations in which you might need to switch SIM cards such as when traveling or upgrading your phone.
When you travel to a foreign country, you might not be able to use your existing SIM card, as it may not be compatible with the local mobile network. You could use auto-roaming with an existing SIM card, but this method is notorious for high pricing. Hence, you will need to switch to a local SIM card or eSIM plan to avoid high roaming charges and enable your phone to connect to local networks. Some new phones may also be compatible with eSIM, which is an embedded SIM card that does not need to be physically inserted into the phone. If you are wondering how to switch SIM cards on iPhones, you need to read on.
What happens if I switch SIM cards on iPhone?
If you switch SIM cards in an iPhone, the phone will recognize the new SIM card and activate it if it is compatible with the phone and the mobile network. When you insert a new SIM card into an iPhone, it will prompt you to activate the new SIM card and set up the phone for use with the new network.
Once the new SIM card is activated, you will be able to make calls and use mobile data on the new network. However, keep in mind that the phone number associated with the new SIM card will be the one that is used for calls and messages, so you will need to inform your contacts of the new number.
It’s also important to note that some iPhone models may be locked to a specific mobile network, which means that they can only be used with SIM cards from that network. If you insert a SIM card from a different network into a locked iPhone, it may not work, and you may need to contact the mobile network provider or the phone manufacturer to unlock the phone.
Top 3 questions asked about how to switch SIM cards on iPhone
Switching SIM cards is a relatively simple process that can enable you to use your phone with a different mobile network or when traveling internationally. However, before switching SIM cards, there are a few important things to keep in mind as discussed below.
- Will I lose my contacts if I switch the SIM cards on iPhones?
No, you won’t lose your contacts by switching SIM cards. The SIM card contains information about the mobile network and the user’s account, including contacts and messages. When you switch SIM cards, your contacts may not be immediately available on the new SIM card, but they will still be stored on your phone. If your contacts are not automatically transferred to the new SIM card, you can manually import them from your phone’s memory or backup. It’s also a good idea to back up your contacts to an external source, such as iCloud or Google, to ensure that they are not lost.
- Does my phone need to be backuped?
Before switching SIM cards, it is a good idea to back up your phone’s data, including contacts, messages, photos, and apps. This will ensure that your data is not lost during the switch. You can back up your iPhone using iCloud or iTunes, or your Android phone using Google Drive or a third-party backup app. Once your phone is backed up, you can switch the SIM card, and your data will be available on the new SIM card.
- Does my iPhone need to be unlocked to switch SIM cards?
Some phones may be locked to a specific mobile network, which means that they can only be used with SIM cards from that network. If you insert a SIM card from a different network into a locked phone, it may not work, and you may need to contact the mobile network provider or the phone manufacturer to unlock the phone. If your phone is not locked, you can switch SIM cards without any issues.
How to Switch SIM Cards on iPhone
5 things to check before switching SIM cards on iPhone
To switch SIM cards, you typically need the following:
- New SIM card
You will need to obtain a new SIM card that is compatible with your phone and the mobile network that you want to use. You can usually obtain a new SIM card from your mobile network provider, or from a third-party seller.
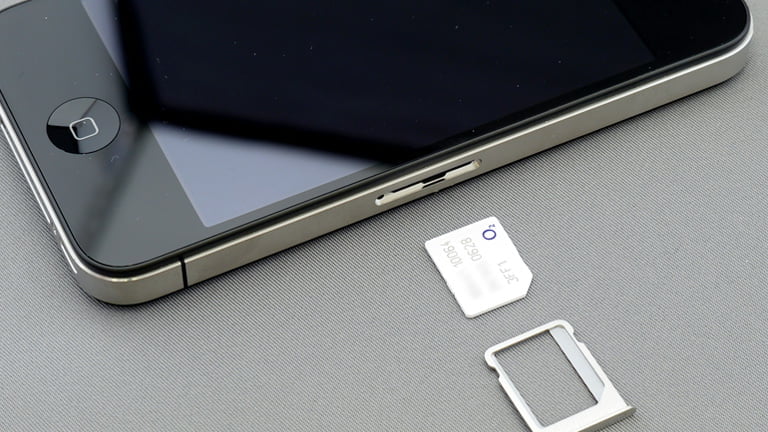
- SIM card removal tool or paper clip
Most phones have a small SIM card tray that holds the SIM card. To remove the SIM card, you will need a SIM card removal tool or a small paper clip to eject the tray.
- Wi-Fi or cellular data
When you insert a new SIM card, your phone will need to connect to the mobile network to activate the new SIM card. This requires a working Wi-Fi or cellular data connection.
- Phone settings
Once the new SIM card is activated, you may need to update your phone settings to ensure that it is set up for use with the new network. This may include setting up APN settings, updating network settings, or adjusting other phone settings to ensure that the phone is working properly with the new SIM card.
- Contacts backup
While switching SIM cards, you may need to back up your contacts to avoid losing them. This can be done through your phone’s settings, backup and restore options, or cloud services.
How can I switch SIM Cards on my iPhone?
To switch the SIM card on iPhones, follow these steps:
- Turn off the iPhone
Press and hold the power button until the “slide to power off” slider appears on the screen. Swipe the slider to turn off the iPhone. - Locate the SIM card tray
Depending on your iPhone model, the SIM card tray may be located on the right side or the left side of the phone. The iPhone 4 and 4S have the SIM card tray located on the top of the phone. - Insert the SIM card removal tool
If you have a SIM card removal tool, insert it into the small hole next to the SIM card tray. If you don’t have a SIM card removal tool, you can use a paper clip instead. Gently push the tool or paper clip into the hole until the SIM card tray pops out. - Remove the old SIM card
Take out the old SIM card from the SIM card tray by sliding it out. - Insert the new SIM card
Place the new SIM card into the SIM card tray, making sure that the notched corner of the SIM card is facing the correct way. Gently push the SIM card tray back into the phone until it clicks into place. - Turn on the iPhone
Press and hold the power button until the Apple logo appears on the screen. Your iPhone should now recognize the new SIM card and activate it if it is compatible with the phone and the mobile network. - Set up the iPhone for the new network
Once the new SIM card is activated, you may need to update your phone settings to ensure that it is set up for use with the new network. This may include setting up APN settings, updating network settings, or adjusting other phone settings to ensure that the phone is working properly with the new SIM card.
Note: If you turn off data roaming on your iPhone, you will not be able to use data services while traveling outside of your home network’s coverage area. You may still be able to make voice calls and send text messages, depending on the availability of a foreign network.
How to Switch eSIM on iPhone
While switching SIM cards is a common practice when changing carriers or traveling internationally, it can be a cumbersome and time-consuming process. Fortunately, the emergence of eSIMs has provided a more convenient alternative. With eSIMs, users can easily switch between carriers without having to physically swap out SIM cards, making the process more efficient and streamlined.
How can I switch eSIM on my iPhone?
It is more convenient for you to switch eSIMs than SIM cards. To switch eSIMs on iPhones, you need to follow these steps :
- Check that your new eSIM is supported
Make sure that your new eSIM is compatible with your iPhone and the mobile network that you want to use. Check with your mobile network provider or from the list of eSIM supported iPhone to confirm that your iPhone supports eSIM before getting the activation code or QR code for the new eSIM. - Add the new eSIM
Tap [Settings] – [Cellular] – [Add eSIM]. You will be prompted to scan the QR code or enter the activation code for the new eSIM. Follow the on-screen instructions to complete the setup process. - Set the default eSIM
After adding the new eSIM, you can set it as the default eSIM by going to [Settings] – [Cellular] – [Default Voice Line]. Select the new eSIM as the default line. - Enable dual-SIM mode
If you have a physical SIM card installed as well, you can enable dual-SIM mode by going to [Settings] – [Cellular] and turning on 2 cellular plans at the same time. This allows you to use both the physical SIM card and the eSIM at the same time. - Test the new eSIM
After setting up the new eSIM, test it by making a call or sending a message. If everything is working properly, you should be able to use the new eSIM without any issues.
eSIM, Use travel data without switching SIM cards
eSIMs are particularly helpful for those who travel frequently or visit multiple countries at once, as they can easily access local networks without having to purchase and switch out physical SIM cards. If you’re looking for a more convenient and efficient way to switch carriers or access local networks when traveling, eSIM from online providers like eSIM Europe and eSIM USA are certainly worth considering as a viable alternative to traditional SIM cards.


I just switched my SIM card to an eSIM card and it was so easy! Thanks for the great guide!
Hi techylist,
We’re thrilled to hear that our guide on switching SIM cards to an eSIM card was helpful to you!
Thanks for taking the time to leave a comment and share your positive experience. If you have any other questions or need further assistance, don’t hesitate to reach out.