
One of the recent advancements in the smartphone industry is the introduction of eSIM, which serves as a replacement for traditional SIM cards. eSIM offers enhanced convenience, allowing users to switch carriers seamlessly without the need to physically swap out SIM cards. However, since eSIM is embedded in the device’s hardware, one might wonder how to delete it when switching to a different device. This article aims to address that very question.
In this article, we will guide you through the step-by-step process of how to remove eSIM from iPhone, ensuring a smooth and hassle-free experience. We will explore various methods you can use to remove the eSIM from your device. By the end of this article, you will have the knowledge and confidence necessary to safely remove your eSIM without compromising any data or functionality. But first, let’s share a few basics about eSIM technology.
Understanding eSIM and its Functionality
eSIM is one of the recent advancements in the tech industry that serves as a replacement for physical SIM cards in smartphones. With eSIM, the SIM functionality is embedded in the device’s hardware, so you don’t need to insert a physical SIM card in your iPhone. Instead, you have to activate the eSIM. The process of activating an eSIM involves scanning a QR code or receiving an activation code from the carrier.
Among the benefits of eSIM is that it gives users the flexibility to switch carriers without the need to physically swap out SIM cards. This option comes in handy for frequent travelers or individuals who often switch between multiple carriers. eSIM-enabled iPhones also allow users to activate up to 8 eSIMs on a single device.
Despite the numerous benefits, there are situations in which you may need to remove your eSIM. These situations may include device upgrades, transferring your device to another person, or traveling to regions where eSIM is not supported. In the next section, we will guide you through the steps of removing an eSIM from your iPhone.
How to Remove eSIM from iPhone
There are two methods that you can use to remove eSIM from your iPhone. These include;
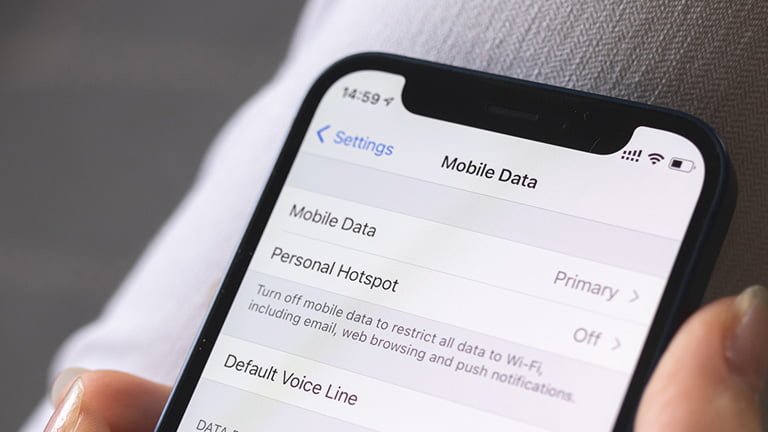
Method 1: Native Settings App
- Launch the Settings app on your iPhone
- Scroll down and tap on “Cellular” or “Mobile Data.”
- Look for the option related to eSIM or cellular plans.
- You should now tap on the eSIM or cellular plan that you want to remove.
- Within the eSIM settings of that SIM, you should see an option to “Remove Cellular Plan” or “Delete Plan” depending on your iOS version.
- You will see a confirmation prompt asking if you want to remove the eSIM. Tap “Delete” or “Remove” to confirm. Confirming will immediately remove the eSIM from your iPhone, and you will no longer be able to use it.
Method 2: Apple Support Guidelines
You can also follow the guidelines on Apple’s support website to remove eSIM from your iPhone. Click this link to Apple’s Support website to follow their guidelines on how to remove eSIM from your iPhone. The guide on Apple’s support site will provide you with the necessary guidance and precautions to successfully remove the eSIM from your iOS device.
Tips and considerations
Before removing eSIM from your iPhone, here are some tips and considerations that you must keep at the back of your mind
Backing Up Data
Before deleting the eSIM from your iPhone, make sure all the data on your iPhone is backed up. Most importantly, make sure your contacts are backed up since some of them may be stored on your eSIM. You may also back up your other data, including messages, photos, and any other data you want to preserve.
You can back up your data on iCloud by going to [Settings] – [Tap] on your name at the top and select iCloud. Choose iCloud Backup and tap on “Back Up Now” to initiate the backup process. If you don’t have an internet connection, you can choose to back up your iPhone using iTunes on your PC or Finder on your Mac.
It is important to note that some eSIM profiles may not be reinstalled or restored after removal. That’s why it may be crucial to contact your carrier beforehand to ensure you can reactivate or transfer the eSIM after removing it from your device.
Resetting Network Settings (Optional)
You may also want to reset your network settings to ensure a smoother transition and optimal network connectivity. Resetting these network settings can resolve any network-related issues that may arise due to the removal. It will also allow your iPhone to establish a fresh connection with the new or existing SIM card.
To reset network settings on your iPhone, go to [Settings] – [General] – [Reset] or [Transfer] and tap on “Reset Network Settings.” You may have to put in your passcode to trigger the process.
Contacting Support (If needed)
If you encounter difficulties during the eSIM removal process, don’t hesitate to contact the support team of your mobile carrier. You can also get help from Apple Support, as they’re always available to resolve any issues with your iPhone. Call Apple Support using any of these Apple Support contacts, depending on your region.
Final thoughts
This article has explored various methods of removing an eSIM from your iPhone. You can remove an eSIM either through the Settings app using the steps we have shared or by following the guidelines provided on the Apple Support website. Removing an eSIM from your iPhone is crucial for situations such as device upgrades, eSIM transfers, or managing your cellular connectivity. Remember to follow the tips we shared to avoid encountering issues after deleting your eSIM.
Overall, eSIM technology is a remarkable advancement that offers flexibility and convenience when switching carriers. If you encounter any difficulties with your eSIM or face challenges with your mobile device’s internet, always keep in mind that eSIM Europe is available to provide support and assistance, ensuring a seamless experience. Do not hesitate to reach out to our support team in such scenarios.

